Please consider making a donation. Creating free software is an
expensive and time-consuming process. Your donation will insure
the continued availability of quality software. Please click the button
below and you'll be taken to PayPal, where you can easily make a
donation to insure the continued production and availability of
quality software for your use.
How to use Thumper
1 Execute the SETUP.EXE program. This will install the thumper.exe program
in C:\Program
Files\Thumper\Thumper.exe
2. Load the Thumper program. Click on the Start button and then find the
program group called: Thumper. The Thumper program should exist
within that group.
3. When the Thumper program loads, it will
automatically reduce itself to a
small
icon in the system tray area, which is normally on the lower right
side of the screen. To bring the Thumper program to the
foreground,
in order to enter the names of
unwanted popup windows, place the
mouse pointer over the Thumper icon
and right-click the mouse. One
of the selection available to you
will be "Restore". Choose
this selection
and left click the mouse to cause
the main Thumper window to appear.
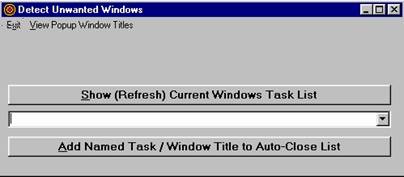
4. When the Thumper main window has been enabled, you will see a
Window
similar to the following example:
|
|
Now click on the “View
Popup Window Titles” menu selection.
The list
of current unwanted
window titles will appear. This list
may look similar
to the following
example:
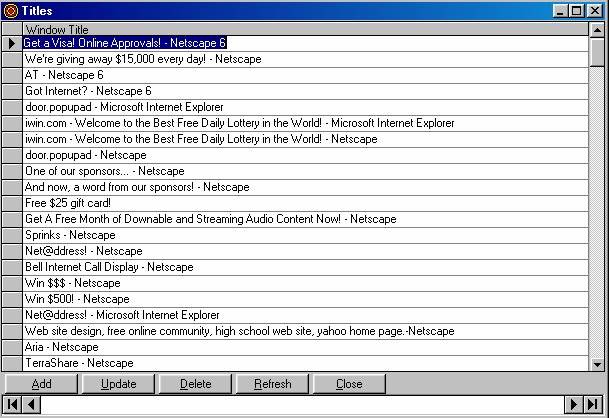
The list will contain
the information, displayed in the title bar, of those popup windows that you
would
like to have
automatically detected, and closed, by Thumper. When you first install Thumper, this list
will be empty. In order to add an entry, follow these
steps.
a. Click
on the "Add" button.
b. Type
the exact string which appears in the title bar of the Window
that you wish to have
detected and closed.
c. Click
on the "Update" button.
d. Click
on the "Close" button.
If the unwanted
window is present when you enter this information, the window should disappear
as
soon as you click on
the "Update" button. If it
does not, then you have entered the unwanted-window
title information
incorrectly.
When you have
completed updating your list of unwanted windows, click on the minimize button
on the
main Thumper
screen. This should cause the program
to return to its state as an icon in the system tray area.
An Alternative Method of
Adding Unwanted Window Names
The
foregoing procedures describe how to manually enter the title of an unwanted
window.
However,
there are times when the actual name of a window may not be easy to discern
exactly.
Thumper
does contain a facility that will compile a list of current window titles
(visible and hidden)
for
your selection. Please note that you
should be VERY CAREFUL when selecting a window title
from
this compiled list. Selecting the
wrong window name could result in the automatic
closing
of a window (or program) that is essential to the execution of the Windows O/S
or
some
other desired application.
In
order to use this capability, refer to the main Thumper screen as pictured
below:
|
|

Press
the “Show (Refresh) Current Windows Task List” button. This will populate the combo
box
(just below this button) with the names of the known tasks currently executing
within the
Windows
O/S. Select the name of the unwanted
window from this list and then press the
button
which is labeled: “Add Named Task / Window to Auto-Close List”. The window
that
you selected should then close. If it
ever appears again, Thumper will close it automatically.
Press
the minimize button on the Thumper main screen.